Urban design checklist: streamline projects with 3D tools

TL;DR:Urban design checklists ensure systematic coverage of community needs, climate resilience, and regulatory compliance.Integrating 3D modelling facilitates visual validation, scenario testing, and reduces errors and project delays.Embedding checklists into dynamic workflows promotes continuous compliance and improves project efficiency.
Urban design projects carry an extraordinary weight of competing demands. Planners and architects must balance community needs, climate resilience, regulatory compliance, and pedestrian experience, all within tight timelines and budgets. A single oversight can trigger costly redesigns or planning refusals. That is why a structured urban design checklist, powered by advanced 3D modelling tools, has become indispensable for modern project teams. As good urban design principles confirm, checklists ensure all criteria from climate resilience to pedestrian experience are systematically addressed. This article walks you through a practical, field-ready checklist framework and shows how 3D technology turns each item from a box-ticking exercise into a validated, collaborative decision.
Table of Contents
- Core criteria for a robust urban design checklist
- Global perspectives: learning from leading urban design frameworks
- Harnessing 3D modelling workflows for checklist compliance
- Safety, security, and liveability: the final checklist pass
- Why the urban design checklist is only as powerful as your integration
- Streamline your urban design projects with 3D Cityplanner
- Frequently asked questions
Key Takeaways
| Point | Details |
|---|---|
| Comprehensive criteria matter | Urban design checklists work best when covering site, user, resilience, and community needs. |
| 3D tools boost efficiency | Integrated 3D modelling cuts design time up to 40% and reveals issues before build. |
| Safety is non-negotiable | Final checklist passes must include security, accessibility, and public realm liveability. |
| Global frameworks inspire | Learning from cities like Singapore and Cambridge raises checklist standards. |
| Dynamic checklists win | Live, collaborative checklists embedded in 3D workflows avoid costly project surprises. |
Core criteria for a robust urban design checklist
Every effective urban design checklist begins with a thorough contextual analysis. Before any design decisions are made, your team needs a clear picture of the site and its surroundings. This means gathering site photographs, documenting neighbourhood history, mapping access routes, and identifying existing infrastructure constraints. Skipping this stage is one of the most common causes of late-stage design revisions.
Submission requirements form the next critical layer. Each project phase demands specific documentation, and missing items can stall approvals for months. The PDC submission checklist covers essential materials, visual studies, and regulatory details for each project phase, providing a reliable reference point for teams working across multiple jurisdictions.
Your checklist should include the following core categories:
- Contextual analysis: Site photographs, neighbourhood character studies, topographic surveys, access and circulation mapping
- Submission documentation: Plans, sections, elevations, material schedules, and regulatory compliance statements
- Stage-specific studies: Shade and massing analyses, stormwater management plans, traffic impact assessments
- Universal design: Accessibility provisions, health and wellbeing considerations, climate resilience measures
“A checklist is not a formality. It is the project team’s shared memory, ensuring nothing critical falls through the gaps between disciplines.”
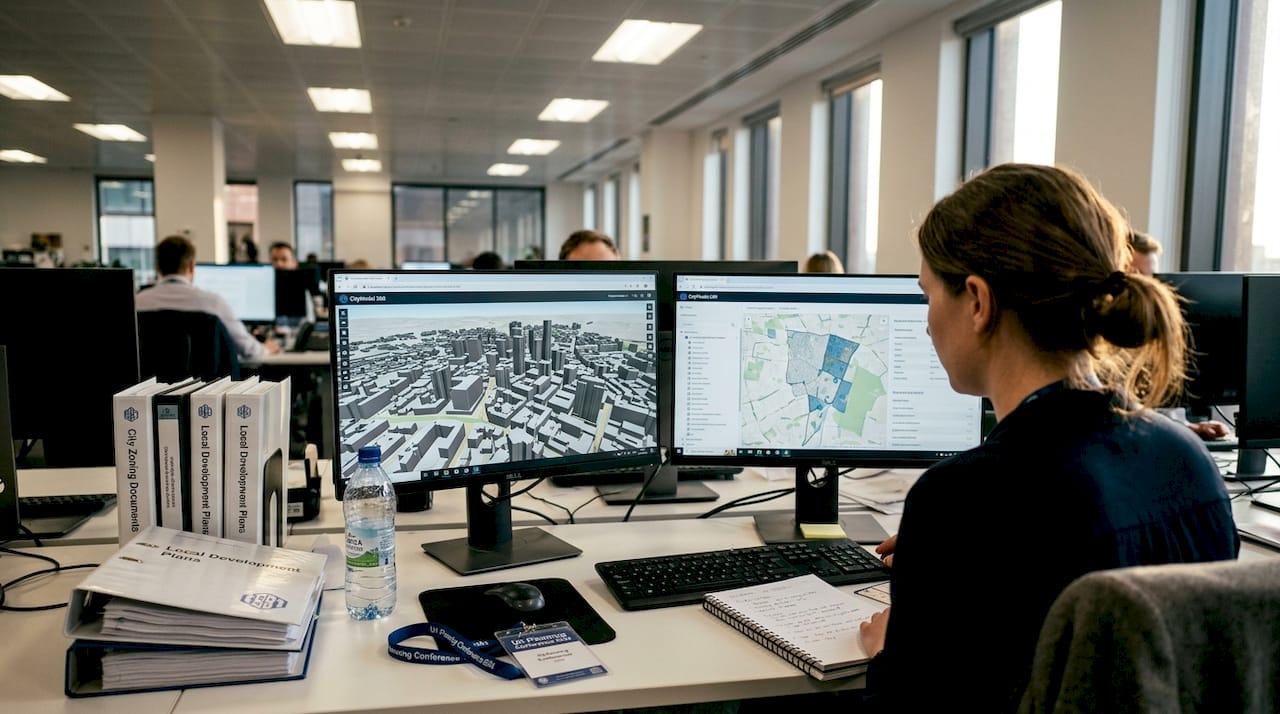
Building an efficient 3D planning workflow from the outset means these checklist items can be validated visually rather than relying solely on written reports. Massing studies become interactive models. Accessibility routes become walkable simulations. This shift from static documentation to dynamic verification is where modern checklists gain their real power.
Climate resilience deserves particular emphasis. Urban heat island effects, flood risk, and wind corridors are increasingly scrutinised by planning authorities. Your checklist must include provisions for green infrastructure, permeable surfaces, and passive cooling strategies at every design stage.
Global perspectives: learning from leading urban design frameworks
Having established core checklist criteria, let us see how top cities put these into practice. Three frameworks stand out for their rigour and transferability.
Singapore’s Urban Redevelopment Authority outlines 9 urban design elements, spanning urban patterns, building typology, roofscape, and street-level activation. Cambridge, meanwhile, focuses its urban design guidelines on context sensitivity, open space quality, and long-term sustainability. NYC’s principles address density, connectivity, and public realm vitality.
| Framework | Key focus areas | Scale emphasis | Stakeholder priority |
|---|---|---|---|
| Singapore URA | Urban patterns, roofscape, street activation | City-wide and precinct | Developers, planners |
| Cambridge guidelines | Context, open space, sustainability | Neighbourhood | Community, designers |
| NYC principles | Density, connectivity, public realm | Borough and block | Planners, residents |
Each framework offers transferable lessons. From Singapore, take the discipline of evaluating roofscape and street-level experience as distinct checklist items. From Cambridge, borrow the emphasis on contextual fit and open space provision. From NYC, adopt the focus on connectivity and the measurable quality of public realm.
Key takeaways for your own checklist development include:
- Assess building typology and massing at multiple scales, from city-wide down to individual block level
- Include specific resilience measures such as flood modelling and urban heat assessments
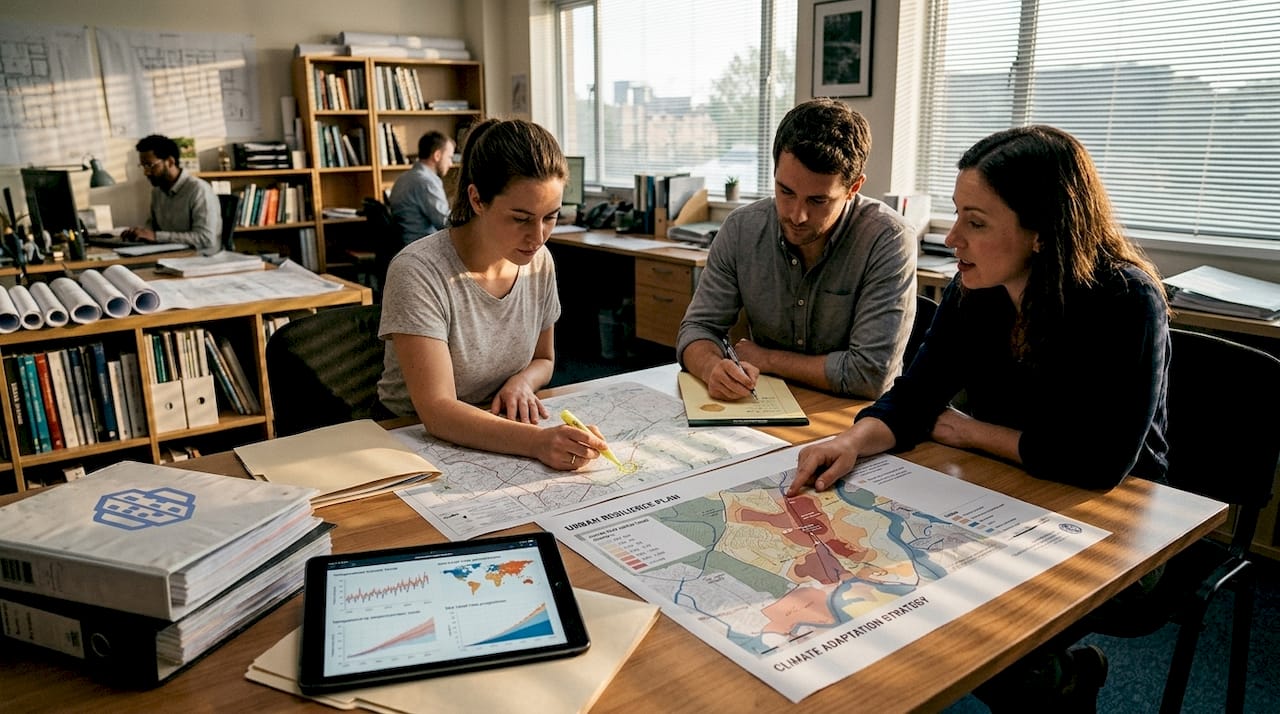
- Build in stakeholder engagement checkpoints at each design phase
- Evaluate roofscape and ground-floor activation as separate, scored criteria
Using 3D city models allows you to test these criteria simultaneously rather than sequentially. A single model can reveal how a proposed building affects sightlines, shadows, and street-level character all at once, compressing weeks of manual analysis into hours.
Harnessing 3D modelling workflows for checklist compliance
With global guidelines as inspiration, the next challenge is ensuring checklist adherence. Here is where 3D technology excels.
The empirical case is strong. 3D tools reduce errors by 25% and cut project delivery time by 20 to 40 percent through coordinated workflows and scenario simulations. These are not marginal gains. On a complex mixed-use development, a 25 percent reduction in errors can represent significant cost savings and months of avoided rework.
Here is a practical numbered workflow for integrating 3D tools into your checklist process:
- Import GIS and BIM data into your 3D environment to establish an accurate site context from day one
- Model massing and shade studies to validate planning envelope compliance before detailed design begins
- Run scenario simulations for wind, noise, and stormwater to address environmental checklist items early
- Conduct accessibility walkthroughs using first-person visualisations to verify universal design provisions
- Generate compliance reports directly from the model, linking outputs to specific checklist criteria
| Checklist item | Traditional method | 3D workflow benefit |
|---|---|---|
| Shade and massing | Manual calculations | Automated solar analysis |
| Accessibility routes | Paper plans | Walkable 3D simulation |
| Stormwater management | Separate engineering reports | Integrated terrain modelling |
| Visual impact assessment | Photomontages | Real-time viewpoint analysis |
Pro Tip: Use generative design tools at the earliest feasibility stage to test multiple massing options against your checklist criteria simultaneously. This prevents compliance issues from becoming embedded in the design before they are identified.
The NYC submission checklist provides a useful benchmark for the level of detail required at each submission stage. Mapping these requirements to your 3D workflow ensures outputs are submission-ready rather than requiring reformatting. Exploring top 3D modelling software options and advanced 3D urban modelling techniques will help your team select the right tools for each project type.
Safety, security, and liveability: the final checklist pass
Once 3D workflows drive compliance, attention shifts to the checklist’s vital social and safety elements. This final pass is where many projects either succeed or fall short in the eyes of communities and planning committees.
CPTED, which stands for Crime Prevention Through Environmental Design, provides a structured lens for this review. The St. Paul CPTED checklist verifies natural surveillance, landscape safety, access control, and ongoing maintenance provisions. These principles are not optional extras. They are increasingly mandated by planning authorities across the UK, US, and Australia.
Your final checklist pass should cover:
- Lighting: Adequate illumination of pathways, entrances, and public spaces, verified through 3D lighting simulations
- Visibility: Clear sightlines from buildings to streets, minimising concealed spaces that reduce natural surveillance
- Landscaping: Planting that enhances safety rather than creating hiding spots, following CPTED landscape rules
- Activity support: Ground-floor uses that generate footfall and passive surveillance throughout the day and evening
- Territorial reinforcement: Clear transitions between public, semi-public, and private spaces
- Universal access: Step-free routes, tactile paving, and accessible amenities verified against disability standards
Statistic: Research cited in Cambridge safety guidelines highlights that well-designed public realm significantly increases community use and perceived safety, reinforcing the business case for thorough liveability reviews.
Pro Tip: Run your safety checklist items through 3D models for safety design to identify blind spots and poorly lit zones before construction documents are finalised. This is far cheaper than post-construction remediation.
Liveability extends beyond safety. Cultural context, access to amenity, and the activation of public spaces all influence whether a development becomes a valued part of its neighbourhood or sits unused. Your checklist should score each of these factors, not merely confirm their presence.
Why the urban design checklist is only as powerful as your integration
Here is an uncomfortable truth that most checklist guides avoid: a checklist sitting in a shared drive, updated quarterly, is nearly useless on a fast-moving project. The sum of all the criteria covered above is impressive. But the real differentiator is not the checklist itself. It is how seamlessly that checklist is embedded into your live, collaborative workflow.
Static checklists create a false sense of security. Teams tick boxes at milestones and move on, unaware that design changes made the following week have invalidated three compliance items. The solution is to treat your checklist as an active project dashboard, not a sign-off document. When 3D tools are properly integrated, every design change can trigger an automatic re-evaluation of affected checklist items.
Teams that embed checklists into their project optimisation workflow consistently report faster compliance sign-off and fewer costly surprises at planning submission. The checklist becomes a living instrument rather than a retrospective audit. That shift in mindset, from compliance record to design guide, is what separates high-performing project teams from the rest.
Streamline your urban design projects with 3D Cityplanner
If you are ready to move your checklist from paper into practice, 3D Cityplanner offers the tools to make that transition seamless. The platform integrates all checklist stages in a single environment, from contextual analysis and massing studies through to safety simulations and compliance reporting.
With 3D Cityplanner, your team can run scenario tests, track compliance against live project data, and share verified outputs with stakeholders in real time. Explore the full tools feature list to see how each platform capability maps to your checklist requirements. Or go straight to the city planning tool and start a project demo without any upfront commitment. Your checklist deserves a platform that keeps pace with your project.
Frequently asked questions
What should every urban design checklist include?
An effective urban design checklist covers context analysis, accessibility, sustainability, detailed submission plans, and safety factors including CPTED. The PDC submission requirements provide a reliable benchmark for the level of documentation expected at each project phase.
How do 3D modelling tools improve checklist compliance?
3D tools visualise requirements, automate compliance checks, and reduce project errors by 25% through coordinated scenario simulations, making it far easier to catch issues before they become costly design changes.
What are international best practices for an urban design checklist?
Singapore and Cambridge provide detailed frameworks addressing scale, greenery, building typology, and health. The 9 urban design elements from Singapore’s URA are particularly useful for structuring a comprehensive checklist across multiple design scales.
Why is CPTED important in urban design?
CPTED ensures public spaces are safe and welcoming by focusing on natural surveillance, territoriality, and maintenance. The St. Paul CPTED framework offers a practical, field-tested structure for incorporating these principles into your final checklist review.
How can teams keep urban design checklists actionable?
Embedding checklists into interactive 3D workflows allows teams to track, update, and validate requirements in real time, ensuring that design changes are immediately reflected in compliance status rather than discovered at the next milestone review.
Recommended
- Urban Development Workflow for Efficient 3D Planning – 3D Urban Development
- Urban infrastructure planning guide for advanced 3D optimisation – 3D Urban Development
- Urban project optimisation with advanced 3D tools in 2026 – 3D Urban Development
- Urban planning workflow explained: optimise projects in 2026 – 3D Urban Development